
 Styled sections are really powerful tools that help highlight your site’s content while keeping things cohesive with your own artistic brand. They open up many doors to include more imagery, colour, and layout options to keep your site engaging.
While sections can be particularly helpful on one page websites, they can certainly be applied to any page on your website where you want to bring attention and differentiation to the features that you add.
There are many aspects to include to make sure your band website design is thorough and professional, like an effective bio, a great music page, and an EPK. Once you have created your music website and your main content is in place, you can dig a little deeper and customize some sections to create a website that suits your style.
A key to great website design is to keep your site visitor’s eye moving along the page. Changes in colour, texture, and movement can help with this, which can all be achieved through custom section styles. There are so many aspects to think about here, and you may be wondering: Can you create a band website design that sets off your content without being too cluttered?
Yes! The key is to come up with a solid colour scheme and find some great textural images that you can use throughout your site. Here is a walkthrough of the steps to follow to make a beautiful site with styled sections!
Organize your content
A section is essentially a block of space on a page that you can add features within. It is nice to use sections to break things up by category, or to place emphasis on a specific feature on a page.
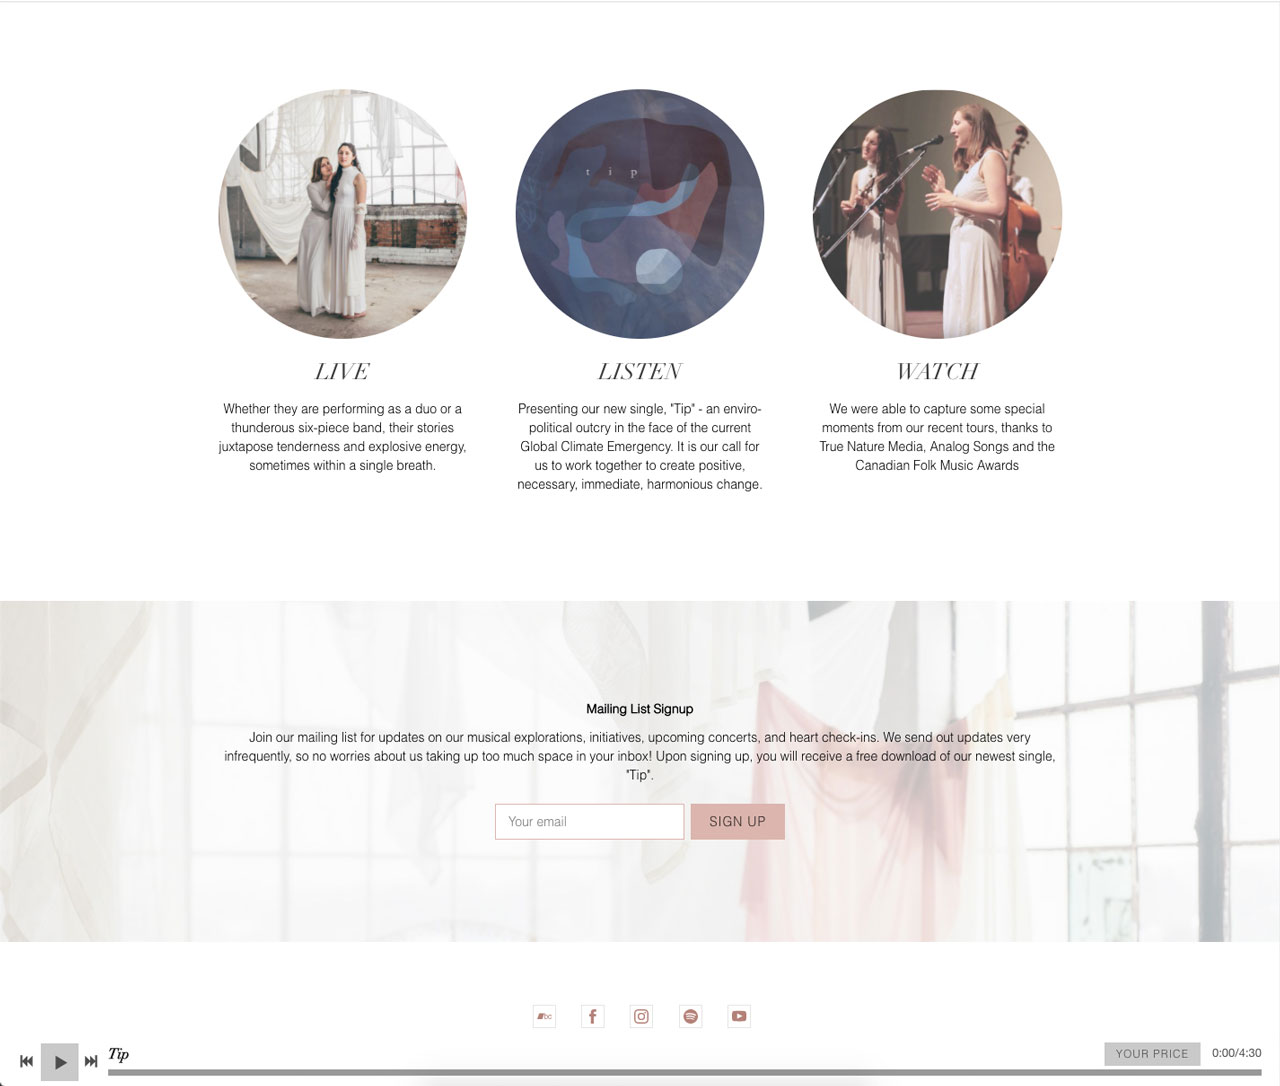
For example, you can use styled sections to call attention to your Mailing List Signup feature, or split a section into three columns to add three Image and Text features for some nice calls to action on the Home page. This is seen in the example below.
It’s quite simple to add a section to any page within your control panel. Under “Edit Content”, move your mouse over the page layout - you’ll see a blue “+Add Section” button appear above or below an existing section.
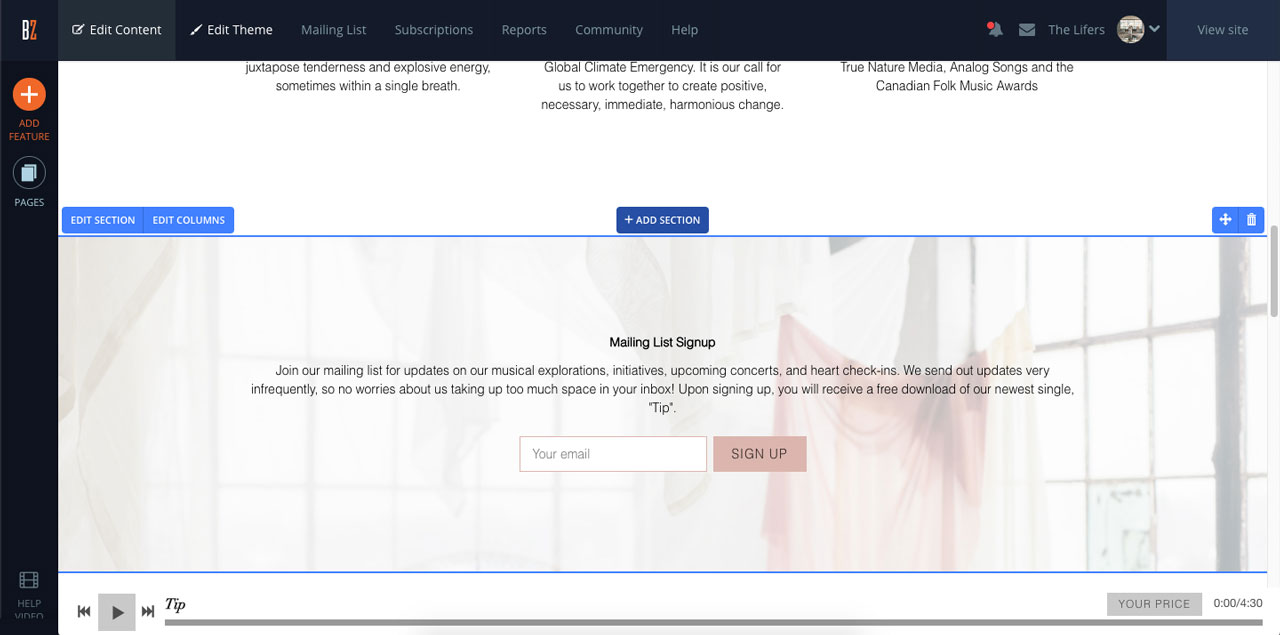
Click that button to add a new section!
You can also adjust the columns for each individual section here, by clicking the “Edit Columns” button on the top left of the section. You can choose between 1, 2, and 3 columns, with a few asymmetrical options for left or right sidebars.
Customize your section styles
For some more artistic flair, set up to three distinct section styles in the Edit Theme tab. Your Section Styles are where you customize your section background, as well as text, link and button colours. This is where you’ll really set the tone for the sections on your site - you can set high contrast colours between sections, or opt for more subtle color differences - whatever suits your aesthetic.
Like the rest of your band website template design options, you would adjust your section styles under the “Edit Theme” tab of the control panel.
In the theme editor options on the left, just scroll down to your ‘Section style 1’, ‘Section style 2’, and ‘Section style 3’ options, select your color settings, and when you have everything set just right, click ‘save’ to apply your changes.
Set your section properties
Once you have set your section styles in the Edit Theme tab, you can head back to the Edit Content tab and apply different properties to the sections on your site. Hover over a section and click “Edit Section” in the top left corner of that section. The properties that you can adjust are Section Colours (pulled from the Section Styles you’ve set), Background Image & scroll effect, and Section Padding.
You can also add an optional Title to the section and adjust the justification of this title to your taste. This title can also be added as a sub-menu item if you toggle “on” the “Show in menu” switch. This would be used if you have quite a lot of content on a particular page and you want to provide an easier way to access all this content.
To change the Section Colours, click on “Section Colours” and then select a section style from the dropdown menu.
To change the Section Padding, click on “Section Padding” and choose from none, small, medium, large, or extra large. Padding provides more spacing on the top and bottom of the content in a section and can create whitespace for a polished look.

Click “Save” to save all of these changes. I am going to elaborate on the Background Image options below, because there is so much potential here!
Add a background image
The possibilities with section background features are endless with the added texture, depth, and personal style that these offer. In theory, you could set a background image for every section on your site so that it is entirely image-based with no solid blocks of colour. This is a really powerful move if you want to create a very visually-minded site.
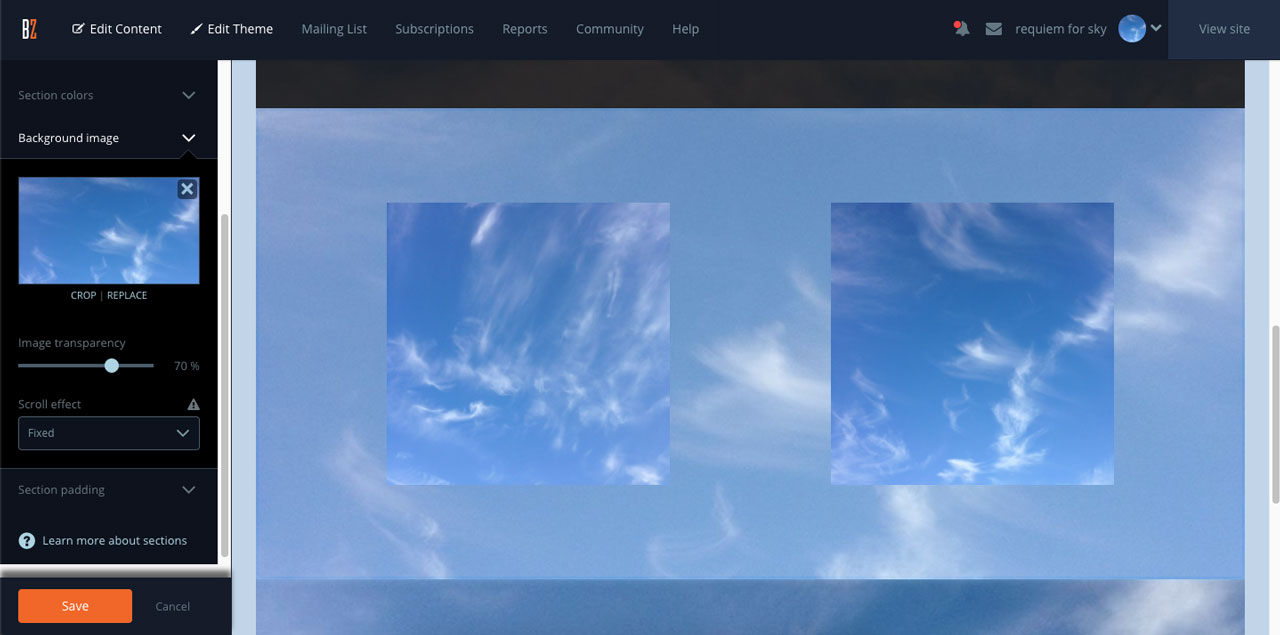
It is important to keep cohesion in mind when doing this. You’ll want to make sure all of these images sit within a similar color palette, and don’t have a lot of detail going on in them. Here is an example of a site I created using different images of sky & clouds: requiem for sky
To add a background image to a section, click “Edit Section” again, and then click “Background Image.” From here, click “add image” and either upload a new image or choose an image from your Image Picker. Click “Apply”. You can then crop and zoom into the image as needed, and click Save.
From here, you can set the image transparency. Depending on the content in the section, you may want to leave the image transparency at a low percentage (below 20%). But, if the image is not going to get in the way of the content here, you can bump it up quite a bit. In my example here, I’ve set the transparency to 70%. You can choose a different section style to combine a coloured background with the image you’ve chosen as well.
Next, set your Scroll Effect. You can choose to omit this, but we have a couple of options that are quite lovely. The Parallax scroll effect gives a neat three dimensional effect as the background image scrolls at a slightly different rate than the page itself. The Fixed scroll effect fixes the image on the background, and the rest of the content scrolls across it. You can play around with these as needed. Again, click “Save” to apply these changes.
Have fun playing with custom section styles!
As you can tell from these examples, the styling and layout options that sections provide are so fun to work with. They make it easy to design a beautiful music website. Many of our website templates come with some pre-made styled sections to get you started, and all of them are mobile-ready as well. I hope this post gives you the confidence to try out all these possibilities!
Design a professional, mobile-ready website in minutes that is easy to update and maintain. Build your band website with Bandzoogle today!
Why not share this with your friends?
Build a stunning band website and store in minutes
- Promote your music on your own unique website.
- Sell music & merch directly to your fans. Keep 100%.
- Grow your fan base with built-in marketing tools.
Free 30 day trial, no credit card needed.

Comments
There are no comments yet.